DIY Capiz Wall Art – Easy & Affordable Tutorial for Beginners
If you’ve ever looked at your walls and felt like they were missing something, you’re not alone. I’ve lived in my home for over two years, and there were still blank walls that desperately needed some attention. But here’s the thing: wall decor can be expensive, and I don’t always want to invest in pricey artwork—especially since I love switching things up often.
That’s where DIY wall art comes in. Creating your own decor allows you to save money, unleash your creativity, and fill your home with pieces that are truly unique. Today, I’m sharing a project that checks all those boxes: DIY Capiz Wall Art.
Inspired by a model home I toured, this project is affordable, elegant, and beginner-friendly. The final result mimics the look of capiz shells—those translucent discs often used in luxury lighting and decor—but without the cost. All you need are a few simple supplies like wax paper, fabric, and a frame.
This project is perfect for small spaces like a powder room, entryway, or even as part of a gallery wall. And best of all? You can customize it to your style with different fabrics, colors, and finishes.
👉 Here’s the YouTube video tutorial you can watch for step-by-step visuals. Let’s dive in!
Supplies You’ll Need
Here’s what you’ll need to recreate this DIY Capiz Wall Art project:

Wax paper (3 sheets per fused layer)
Parchment paper (2 sheets, one for top and bottom)
Mini iron or household iron
Circle punch (or household item to trace circles, like a mug or coffee pod)
Poster board (cut to frame size)
Gray linen fabric (or any fabric of choice)
Picture frame with mat (IKEA Ribba or similar, approx. $25)
Optional: Ruler, pencil.
Step 1: Fuse the Wax Paper
The first step is to create the translucent “capiz shell” effect.
Place one sheet of parchment paper down on your work surface.
Stack three sheets of wax paper on top.
Cover with another piece of parchment paper.
Slowly iron over the top sheet to fuse the wax paper layers together.
When you peel back the parchment paper, you’ll notice the wax paper has bonded into a sturdier, more opaque sheet—perfect for cutting circles.
This step is surprisingly fun and easy. It instantly gives you that frosted, natural look similar to real capiz shells.
Step 2: Cut the Circles
Now it’s time to create your shapes.
If you have a circle punch, this is the fastest way to make uniform circles.
Don’t have one? No problem! Use a household item like a mug, small vase, or even the lid of a container to trace circles onto the wax paper. Cut them out with scissors.
Aim for circles that are about 2–3 inches wide, but you can vary the sizes for a more organic look.
Pro Tip: Don’t stress about perfection. Real capiz shells aren’t perfectly uniform, so variation adds to the charm.
Step 3: Add Metallic Accents
To elevate the look, we’ll add a touch of gold to each circle.
Place a small stick or scrap piece of cardboard halfway across the circle.
Using a metallic gold marker, color one side of the circle.
Let dry for at least 1–2 hours.
This simple detail makes the artwork look more dimensional and luxurious.
Step 4: Prepare the Frame Backing
Next, let’s prepare the background for our wall art.
Take the poster board cut to the size of your frame backing.
Cover it with linen fabric (or any fabric you love).
Instead of gluing, I recommend stapling the fabric to the poster board. This way, you can easily change it out in the future if you want a different look.
The linen adds texture and makes the art look more high-end.
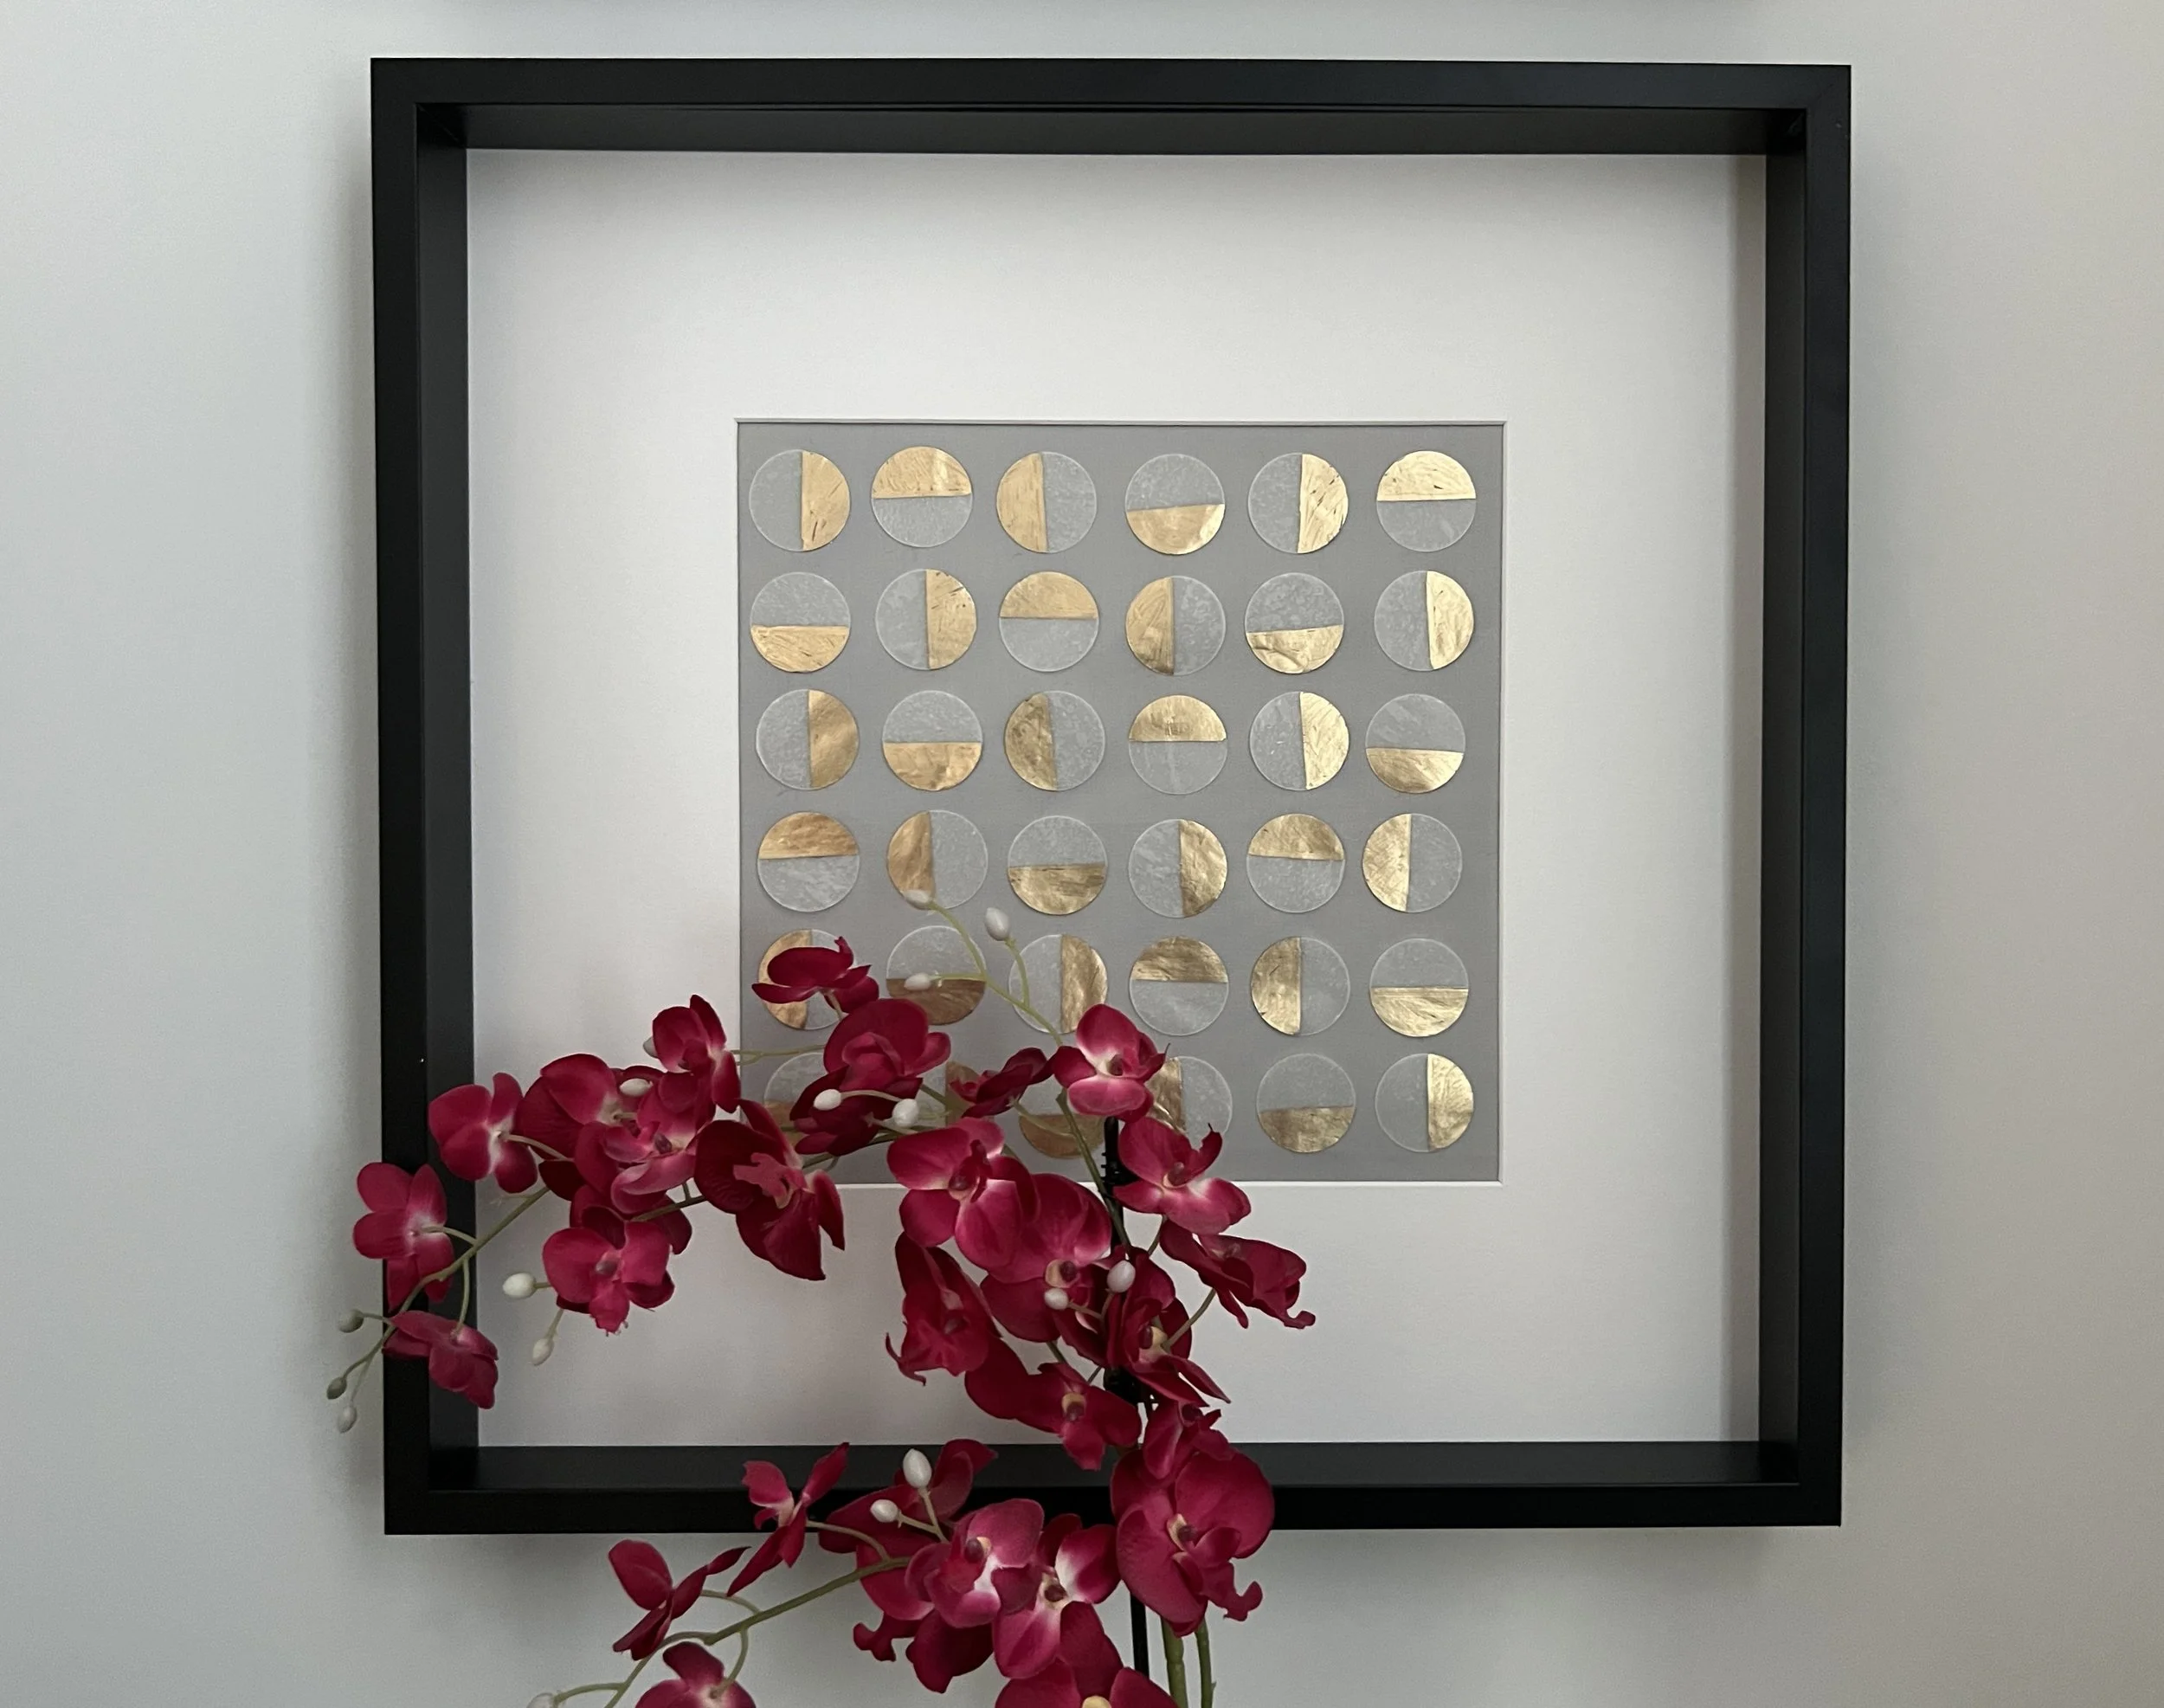
Step 5: Arrange the Circles
Now for the fun part: designing your artwork.
Place the mat from your frame over the fabric-covered backing.
Start laying out your circles in different directions and angles.
Play with spacing until you’re happy with the composition.
Variation is key here. Mix up how the gold accents face and layer circles slightly for depth.
Step 6: Secure the Circles
Once you’re happy with the arrangement:
Lift each circle carefully and add a small bead of glue on the back.
Place the glue under the gold-colored side so it won’t be visible through the translucent wax paper.
Press gently onto the fabric.
Allow everything to dry fully before reassembling the frame.
Step 7: Assemble and Display
Put the mat and backing into your frame, secure it, and hang it on the wall.
Here’s the before-and-after of my powder room wall:
Before: Plain, blank, and lifeless.
After: Chic, custom wall art that instantly elevates the space.
Why This Project Works
This project checks all the boxes:
✅ Budget-friendly – most supplies are under $25.
✅ Customizable – use different fabrics, marker colors, or frame finishes.
✅ Beginner-friendly – no advanced art skills required.
✅ High impact – looks expensive and unique, perfect for blank walls.
The finished piece looks like something you’d find in a designer showroom, but you’ll know it cost just a fraction to make.
Style Ideas & Variations
Want to make this project your own? Here are some creative twists:
Color Variations: Try metallic silver, bronze, or rose gold markers instead of gold.
Fabric Backgrounds: Switch out linen for velvet, burlap, or even patterned fabric.
Oversized Statement: Use a large frame and make dozens of circles for a dramatic piece.
Monochrome Look: Skip the metallic marker and keep the wax circles plain for a softer, organic style.
Gallery Wall: Create several smaller frames with different designs and group them together.
DIY vs. Buying
Capiz-inspired art in home stores can cost anywhere from $100 to $500 depending on size. With this DIY method, you can create a similar high-end look for under $40 (if you already have the tools).
The beauty of this project is that it doesn’t just save money—it creates something personal. Every circle, brush of gold, and fabric choice reflects your style and creativity.
DIY Capiz Wall Art is the perfect example of how simple materials can become something extraordinary. It’s easy, affordable, and customizable, making it a go-to project for anyone who wants to refresh their walls without spending a fortune.
If your home has blank spaces just waiting for a creative touch, I encourage you to try this project. You’ll be amazed at how much personality and polish it adds to a room.
👉 Don’t forget to check out my YouTube video tutorial for a step-by-step visual guide to making this wall art (insert link).
Until next time, happy creating!
Shop My Finds